Today, I edited! Many editings!
There are a lot of steps to editing, and they vary from project to project – but I thought it might be fun to show some of the my steps and explain what they are and how they help get to a finished audiobook 🙂 Everyone has a different workflow, and they evolve over time, so this is not an instructional page – this is just for fun insight into what I currently do.
![]()
Firstly, step Notion! I didn’t used to do anything like this, like, at all.
I tried to keep everything in my head, and was Not A Good Plan. Then?
NOTION ENTERED MY LIFE. HOW DID I EVEN FUNCTION BEFORE NOTION??
where was I?
 Right! Firstly – I organize my file workflow. One thing I was working on today is Satyros Phil Brucato’s amazing anthology Valhalla With a Twist of Lethe.
Below is a gif of my Notion set-up for an audio book. There’s a main
page – where I have current check-lists of what needs to be done. From
there I can click to my master table of information. This lists the
book by chapter, with columns detailing who the narrator is, what date
the story was recorded, what stage of editing each chapter is in, and
any notes I need to remember for editing or re-takes.
Right! Firstly – I organize my file workflow. One thing I was working on today is Satyros Phil Brucato’s amazing anthology Valhalla With a Twist of Lethe.
Below is a gif of my Notion set-up for an audio book. There’s a main
page – where I have current check-lists of what needs to be done. From
there I can click to my master table of information. This lists the
book by chapter, with columns detailing who the narrator is, what date
the story was recorded, what stage of editing each chapter is in, and
any notes I need to remember for editing or re-takes.
This table for Valhalla is only partially filled out. There are several reasons for this: Valhalla is being narrated by 4 different people, and Life Has Been Happening During a Pandemic, so it’s taken a lot longer for chapters to be narrated by the 4, scattered about in 4 different locations. Thus the strange order of operations going on here! Secondly, now that we’re moving along I made the decision to re-master my completed chapters, because I updated my iZotope from RX7 to RX8, and there are features in RX8 that I really like. Plus I get better at this stuff with every book I record and produce, and my portions of Valhalla were recorded 3 books ago, so I’ve jumped in editing skills a bit!
Please note how fun Notion is
visually 🙂 You can rapidly choose an icon (Phil will understand the
icon choice :D) and a header photo – which in this case is a Viking-ish
house. I am dyslexic, so a clean user interface is vital and Notion has
that – but also icons and photos are huge for helping me know at a
glance which page I’m on. I currently have like six projects going on
at the same time, and a table is a table is a table! If each page has a
colorful identifier thematically appropriate to the book, it helps.
 Here is a fully filled out master table for the book just completed, Gracie & Zeus Live the Dream.
By contrast there’s lots more data here. (I really like the sunshine-y
happy icon and banner I picked for this happy and funny book!)
Here is a fully filled out master table for the book just completed, Gracie & Zeus Live the Dream.
By contrast there’s lots more data here. (I really like the sunshine-y
happy icon and banner I picked for this happy and funny book!)
This book’s master table is a lot more evolved than the one for Valhalla, because it was created before and during recording, rather than in the late editing phase like Valhalla’s data (tragically, I had not yet discovered Notion at the time of recording Valhalla).
You can see that next to the chapter numbers, is a larger number –
that’s the number of words in the chapter. I know roughly how much I
can record and edit in one day based on word-count, and with the
word-count easily visible I can plan for target dates of recording (or,
for some, re-recording). Then a bit farther over, you can see a column
that has the heading ‘out of 60,474k’ – that’s an active tabulating
column. When I record a chapter, I put the number of words in that
tabulating column, and then I can see the running total of completed
words at the bottom. This is purely for ENCOURAGEMENT 😀 Next to that,
is a metric hour/minute column, showing how long chapters are as I
complete them. I can see the current length of the book summed at the
bottom; this provides a running estimate of how long the finished book
will be. I read different books at different paces, so it’s helpful to
see word-count expectation vs. actual length per chapter.
Farther over you can see recording notes – things I need to re-record with the location time-stamp within the file, notes for how I’d like to re-perform it etc. And then next to that is the checklist: proofed! – which is just really satisfying to check off as I do the final listen of each chapter. Also I need to know where I am in the process so I don’t miss anything!
Speaking of proofing, proofing audio has the same problem as proofing text; you are very likely to hear what you know should be there, rather than the error that is there. To get around this, I trick my ear into listening to the chapter in a way it doesn’t expect – I proof at higher speeds. Typically I proof at about 1.5x, a very foreign sound to me. I’m much more likely to catch both word repeats and noises I didn’t catch during the principle edit – the two most likely problems.
A fun example: I sometimes catch noises that are very apparent at high speeds, but imperceptible at normal speed – a very low hum from an airplane passing in the distance, for example, below where humans usually listen (because it’s far below the pitch of the voice you’re focusing on, as well as being at the bottom of the human hearing threshold) can show up audibly at the higher pitch of 1.5x. I’ll sit up and go WHAT? and then slow it down and realize, nope, it’s transient and not audible in the usual course of things! I have a low cut-out filter on my recording set-up; low rumbling of any kind is eliminated at normal speeds, so I’m not used to hearing any! Normally I’d just tune out any sound so low that no one who’s not in the process of a professional edit would even pick it out of the recording. One example of how speeding up a recording makes the ear listen in a whole new way 🙂
 Back
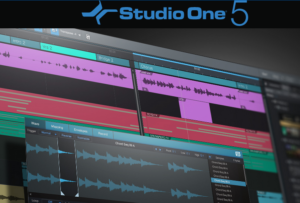
to organizing! Outside of Notion, another aspect of organization is
File Management! When I first started using my current recording
software, Studio One,
I didn’t pay much attention to how it was organizing the audio in
files….and I ended up with a mess. Previously I had a file system that
organized in an entirely different way, so I didn’t realize what I’d set
myself up for in my dyslexic brain! So today, working on the second of
Phil’s books that is about to be released – Red Shoes – I went
rooting around through my miserable jumble of files in the Studio One
folder, to put together all of the files in their first stage of editing
which I call cleanup (more on that in a minute). I decided a couple of
months ago when I upgraded to iZotope RX8, that I was going to re-produce the Red Shoes
files. I have better tools for post-production now, and more
experience with the software overall. This process isn’t difficult
because I’ve made a macro for it – I simply have to drag-and-drop into a
batch processing part of iZotope and let it run. But first i have to find them – aaaaa!
Back
to organizing! Outside of Notion, another aspect of organization is
File Management! When I first started using my current recording
software, Studio One,
I didn’t pay much attention to how it was organizing the audio in
files….and I ended up with a mess. Previously I had a file system that
organized in an entirely different way, so I didn’t realize what I’d set
myself up for in my dyslexic brain! So today, working on the second of
Phil’s books that is about to be released – Red Shoes – I went
rooting around through my miserable jumble of files in the Studio One
folder, to put together all of the files in their first stage of editing
which I call cleanup (more on that in a minute). I decided a couple of
months ago when I upgraded to iZotope RX8, that I was going to re-produce the Red Shoes
files. I have better tools for post-production now, and more
experience with the software overall. This process isn’t difficult
because I’ve made a macro for it – I simply have to drag-and-drop into a
batch processing part of iZotope and let it run. But first i have to find them – aaaaa!
The batch settings used are settings I have spent quite a bit of time (read: a zillion hours give or take) refining for my particular studio soundspace, my particular voice, and my particular microphones. But now that I’ve got them, I can batch process files and this is really nice.
The problem with my utterly scattered file non-management, is that Red Shoes is 56 files o.0 and my dyslexic eyeballs are very likely to leave one out. This has HAPPENED. And is clearly not optimal, sending me scrambling later to find the errant file and process it out of order, which is just that much more difficult to keep organized! So I spent time today tracking down each cleanup edit of all those files, and making a folder for them, so when I do the batch process i’m not running all over my harddrive panicking cause shit is POSSIBLY MISSING OMG.
Here’s the assembled Red Shoes files, all tidy, in one freakin’ place:
I referred to the cleanup edit
stage above – that’s the first and most comprehensive edit. Right
after I record, I listen to the file make any structural changes
desired. I almost never leave re-takes in the file; I record over them
in real time in the studio, so there’s not much ‘remove’ or
‘cut-and-paste all this stuff’ to do in the cleanup edit. Studio One
is lovely, because if I accidentally cut out a word or phrase while
recording retakes, it’s still there (though hidden) and can be recovered
easily. I can stay focused on the performance while in the studio,
rather worrying about losing something I’ll need or want later.
Non-destructive editing is amazing and I couldn’t work rapidly without
it.
The other aspect of the cleanup edit, is removing any accidental sounds that I didn’t hear happen while I was recording. Being focused on the performance can mean occasionally not noticing that someone in the house slammed a door, or my headphone cable brushed against the furniture, or my stomach growled 😀 Studio One has my favorite feature for that! When I start a new recording, it’s in a template that includes a layer of my base room-sound in the studio, when it is absolutely quiet. This layer is as long as the finished recording, and makes sticking silence over a mistaken noise a snap! Watch:

Between those two words, was a thump. All I needed to do to replace the thump with nice clean silence, is highlight the (otherwise silent) layer of room-sound, and Studio One automatically pastes silence over the thump. Ta-da! This makes editing remarkably faster and is freakin’ magic. I love it.
Over the years I have taught myself to narrate in real time at the pace and with the emotional effects that I wish to have in the final recording. (surprisingly (she says, since this seems to surprise people…), one does not narrate the way one speaks – like AT ALL – and learning how to perform narration pacing, enunciation, microphone technique, dialog expressive emotion, making narrative voice interesting, on and on – it is very much a learned skill because it’s not natural speech. it takes the 10k hours they always tell you that mastery takes, just like any other highly skilled art) I learned how to do this well via listening to myself in excruciating detail whilst editing in a much more basic program that forced me to think about every. damn. silence. breath. emotional beat. etc. as I edited. This was incredibly important learning to have done! But oh god I’m so glad I don’t have to edit that way these days! These days, I can simply cover over a thump with a Studio One layer, and keep on editin’!
However!
 There are books which call for a kind of performance timing that doesn’t come naturally to me – Not My Ruckus
is a good example – and I will spend considerably more time on those
cleanup edits, changing the spacing, removing breaths, etc. Not My Ruckus‘s
narrator is a teenaged autistic girl; I have raised a teenaged autistic
girl, and based my performance very much on her speech patterns. But
one thing that did not come naturally to me, was her spacing, the way she doesn’t leave room between sentences/paragraphs – or stops abruptly and leaves a lot
of room. I didn’t want to make the book difficult to listen to, so I
kept the edit subtle, but it was a very important aspect of her
characterization as demonstrated via the performance of her entire
thought process as a 1st person narrator, and I spent a lot of time in
the edit creating the sense of pace and arrhythmic speech pattern that
help inform the reader on an almost unconscious level, that Lilac’s
brain doesn’t work the same way a neurotypical kid’s brain works.
There are books which call for a kind of performance timing that doesn’t come naturally to me – Not My Ruckus
is a good example – and I will spend considerably more time on those
cleanup edits, changing the spacing, removing breaths, etc. Not My Ruckus‘s
narrator is a teenaged autistic girl; I have raised a teenaged autistic
girl, and based my performance very much on her speech patterns. But
one thing that did not come naturally to me, was her spacing, the way she doesn’t leave room between sentences/paragraphs – or stops abruptly and leaves a lot
of room. I didn’t want to make the book difficult to listen to, so I
kept the edit subtle, but it was a very important aspect of her
characterization as demonstrated via the performance of her entire
thought process as a 1st person narrator, and I spent a lot of time in
the edit creating the sense of pace and arrhythmic speech pattern that
help inform the reader on an almost unconscious level, that Lilac’s
brain doesn’t work the same way a neurotypical kid’s brain works.
Ironically, I used to speak very much the same way my daughter does, and my current much more measured, or lively, or direct speech is very much the result of thousands of hours of self-taught and well-directed narration 🙂 I learned myself right out of being able to narrate Lilac!
The cleanup edit is The Big Edit – it’s what people imagine when you say ‘I am editing my audio’; cutting things, moving things – kind of like you’re using a word processor, only with audio. But as I explained above, when you’re learning to narrate there is high value in examining your performance very closely as you edit – to learn pacing, to learn where enunciation isn’t working, to learn where breaths matter (or are not wanted), to learn how to land an emotional beat like a brick-drop. This learning editing process is not something people imagine you’re doing when you say ‘I’m editing.’ It’s very much redesigning your performance in a whole new way, and I think it’s a really critical learning stage. You can teach yourself so much if you simply listen critically and then experiment with lots of different options in the edit. You can learn even more if you have a friend or director who can point out things you hadn’t considered, and then act on their suggestions.
These days, I seldom need to
do that kind of ‘redesign my performance’ edit – but sometimes I see an
opportunity to hugely increase the impact of an emotional beat by
changing the timing, and I’m so so glad I’ve learned how to hear
🙂 I never consider my learning finished in the process – I listen
critically to every performance from phrase to paragraph to page to
chapter, and apply what I hear to the next time in front of the mic
every day.
When you spend time very carefully evaluating your performance and deciding what you like and what you don’t, what works and what doesn’t work…that’s where you develop your own personal sound. This is a double edged sword some times 🙂 I have a very specific narrative sound, and I’ve found it to be very polarizing. People either really love it, or really don’t. And that’s okay. I know what it is I’m aiming for, and I know it very exactly – it’s easy to tell, because it’s very consistent.
This doesn’t mean all of my books sound the same! In fact my books can sound quite different. Compare Not My Ruckus to Gracie & Zeus Live the Dream to Red Shoes to every short story in Valhalla, and you’ll hear a lot of flexibility. The reason I have that flexibility, is because I spent oodles of time deciding on and then refining my approach to performance. Where my performance sits, what is consistent across every thing I do, isn’t the pace or the character voices or the narrative voices … it’s the immersion in the story in such a way that I am transparent to the listener. It’s a very very very very subtle thing, but if there’s something that makes me good, that is what makes me good.
I hope this has been fun to read, for those of you interested in process. I adore process! I watch every DVD extra, I listen to every director commentary, I watch all the ‘how we did that special effect’ behind-the-scenes clips. This meandering post is for all those who enjoy the same process stuff 🙂
And if you have any questions or discussion points, hit me up in comments or on twitter! I love talking shop, both about my process and the process of everyone else as well 🙂